Data Routes
Before we end this tutorial, we'd like to cover one more topic: Routing. As we've gone through creating three distinct Pipelines, configuring a Source, and configuring a default Destination, you might have been asking yourself how those three components come together to take events through the Cribl Stream process. The answer is Routing. Routing has two forms in Stream: Data Routes and QuickConnect.
In this first section, we'll look at Data Routes. A Route has three key components:
- A filter to identify which events will be included. Usually, that filter is based on an
InputId, asourcetype, or some other key-value pair found in the incoming event. - A Pipeline to apply to that event.
- A Destination.
Data Routes also provide the option to clone an event. The clone will maintain the original format of the event, and will be applied to the next Route in the list.
Configure the Filesystem Destination
To demonstrate, let's first create a new Destination, and then create a Route to send events to that Destination.
- With
Manageactive in Stream's top menu, select theDatasubmenu then clickDestinations. - From the resulting tiles, locate and select
Filesystem.
You can use the search box to find it. - On the
Manage Destinations / Filesystempage, clickAdd Destinationin the upper-right corner. - Enter
localin theOutput IDfield. - Enter
/tmp/outin theOutput Locationfield. - Enter
/tmp/stagingin theStaging Locationfield. - In the
Partitioning Expressionenter the below:`${__inputId}/${sourcetype}` - The configuration should look like this (click to enlarge):
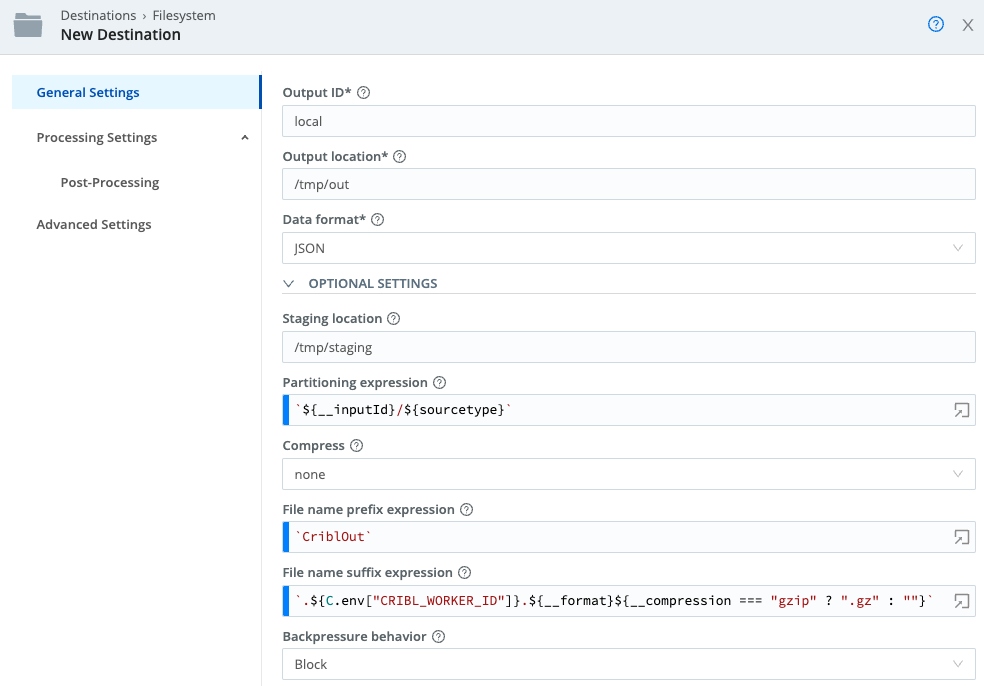
- Click
Save.
Configure the Route
Finally, we can create the Route that will tie this Destination together with the Source and Pipeline we created with our first lookup.
- From Stream's top nav, select the
Routingsubmenu and clickData Routes. - Click
Add Route. - In
Route Name, enteraccess_common. - Paste the following into the Filter field, replacing the default
trueentry:__inputId=='datagen:apache_common' - Set the Route's
Pipelinetoaccess_common_lookup. - Set the
Outputtofilesystem:local. - Drag the Route you've created to the top of the list. When complete, the interface should match this. (click to enlarge)
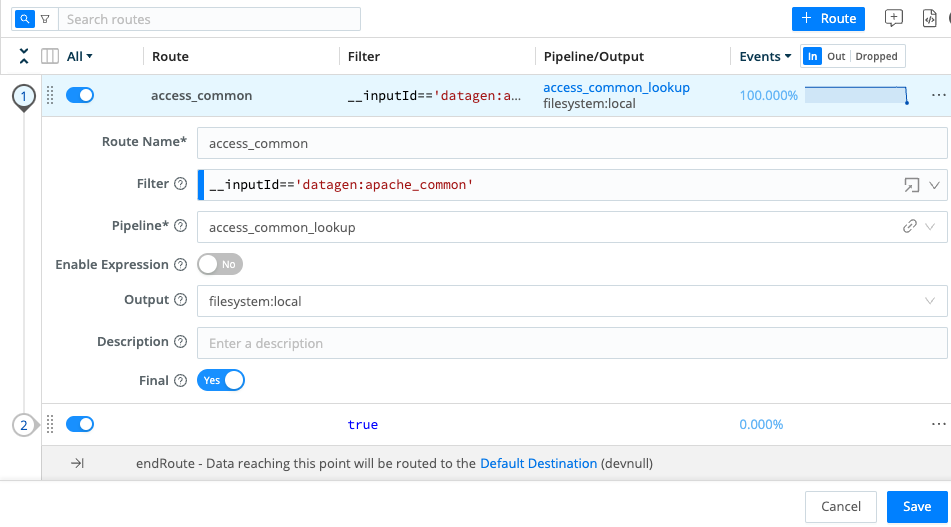
- Click
Save.
View Routed Events
Now, to check your work, let's view the events as they're being saved to your local filesystem.
- If the terminal is not already open, toggle it open on the bottom right.
- At the command prompt, type or paste:
You should see a
ls -l /tmp/staging/localdatagen:apache_commondirectory where our data is getting pushed. - At the prompt, now type or paste:
You should see several new
ls -lR /tmp/staging.tmpfiles created by Stream as out data flows through the route we just created.