Regex Lookup
Now that we have a sample to work with, we can configure the lookup.
Add the Lookup Table
-
With
Manageactive in Stream's top nav, select theProcessingsubmenu and clickKnowledge.Note: Depending on the size of your window, the top nav will consolidate items that won't fit in a pulldown represented by an ellipsis (
...) - if so, click on the ellipsis and then selectProcessingand click onKnowledge. -
If
Lookupsis not already selected in the left sidebar, click to select it. -
At the upper right, click
Add Lookup File, then selectCreate with Text Editor. -
Copy this text to the clipboard:
regex,sourcetype
"^[^,]+,[^,]+,[^,]+,THREAT",firewall_threat
"^[^,]+,[^,]+,[^,]+,TRAFFIC",firewall_traffic -
Paste the clipboard contents into the large text field.
-
Type or paste
firewall_sourcetypes.csvinto theFilenamefield. Your interface should now look like this (click to enlarge):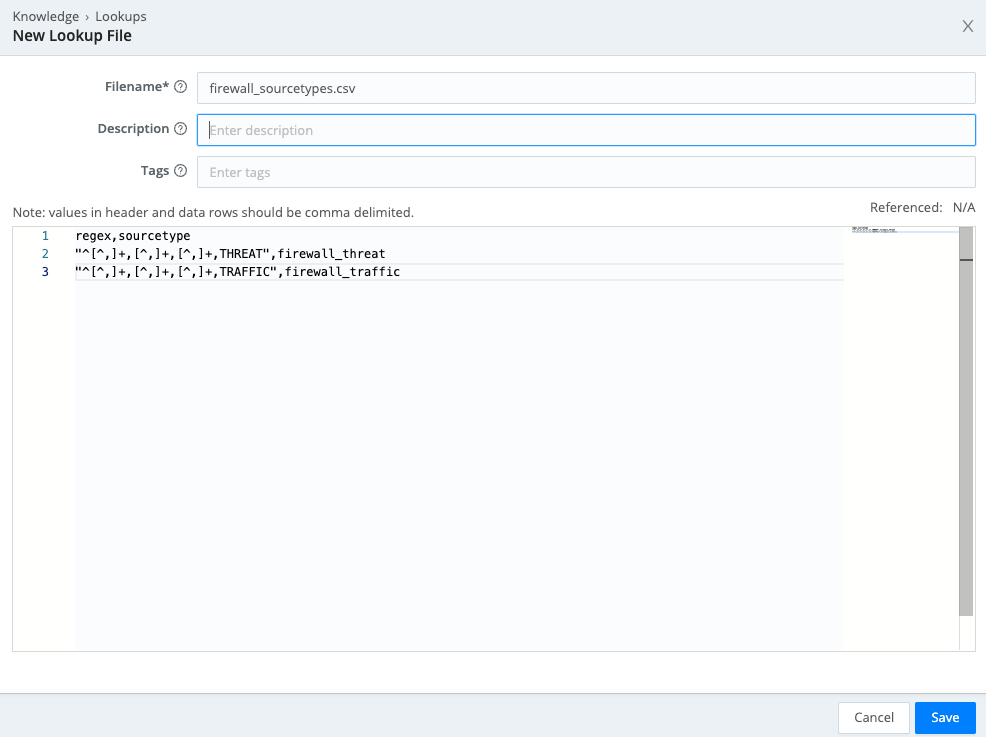 Notice that the first column of comma-separated values contains regular expressions. As we configure this lookup, those regular expressions will be matched against the data in the
 _rawfield. -
Click
Save.
Create a New Pipeline
Now that the Lookup table is created, we can create a new Pipeline to apply it to our data.
Create a New Pipeline
- Select the
Processingsubmenu and clickPipelines. - Click
Add Pipelineand thenCreate Pipeline. - in the
IDfield, enterfirewall_typing. - Click
Save. You now have another new, empty Pipeline.
Configure the Lookup
Next, we're ready to add and configure the Lookup Function.
- In Stream's right pane, make sure the
Sample Datatab has focus. - As you did with previous samples, click
Simplenext to thefirewall.logsample. Your interface should look like this (click to enlarge):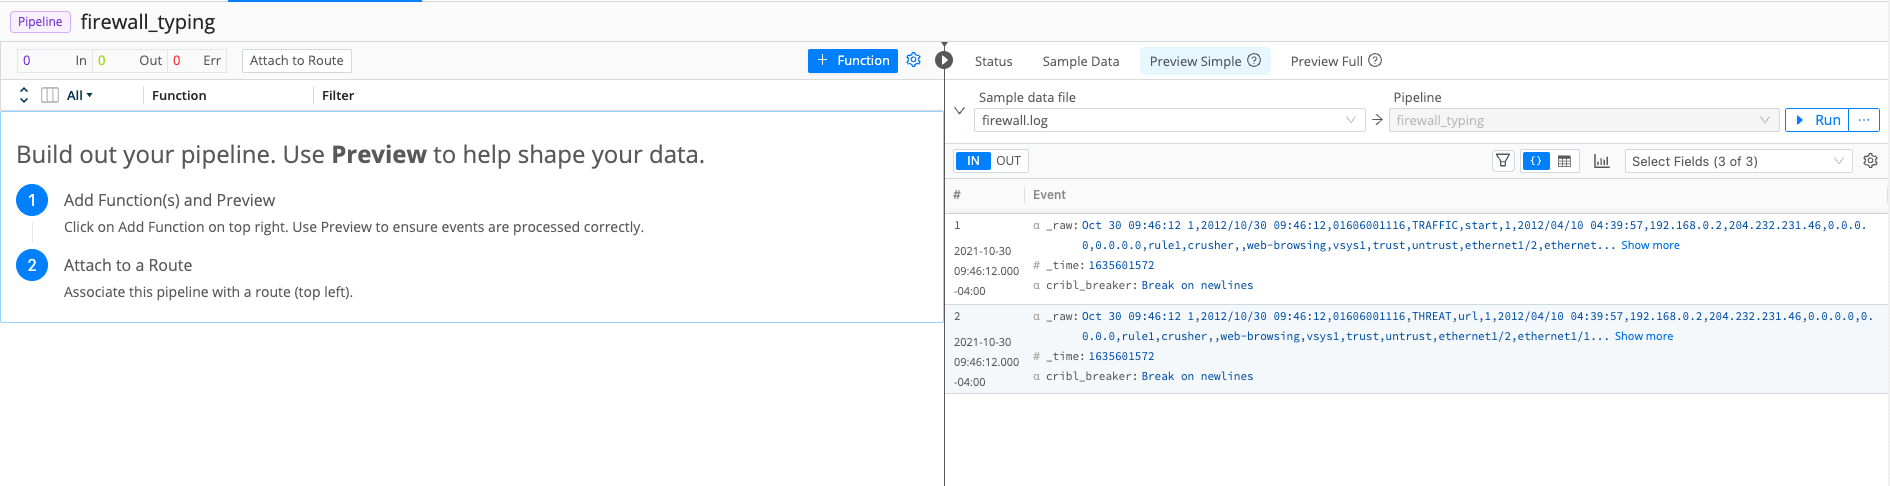
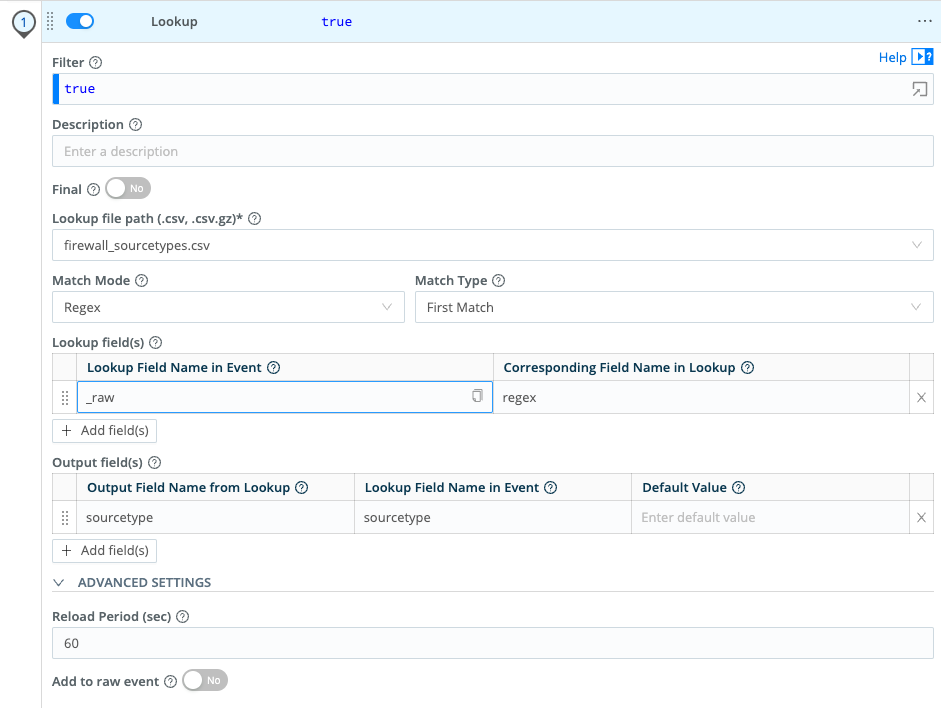
- To add the Lookup Function: In the left pane, click
Add Function, thenStandard, thenLookup. - Configure the Function to match this screenshot (click to enlarge):
- Click
Save. - In the right Preview pane, toggle between
INandOUT. When selectingOUT, you should see the lookup values added to each event.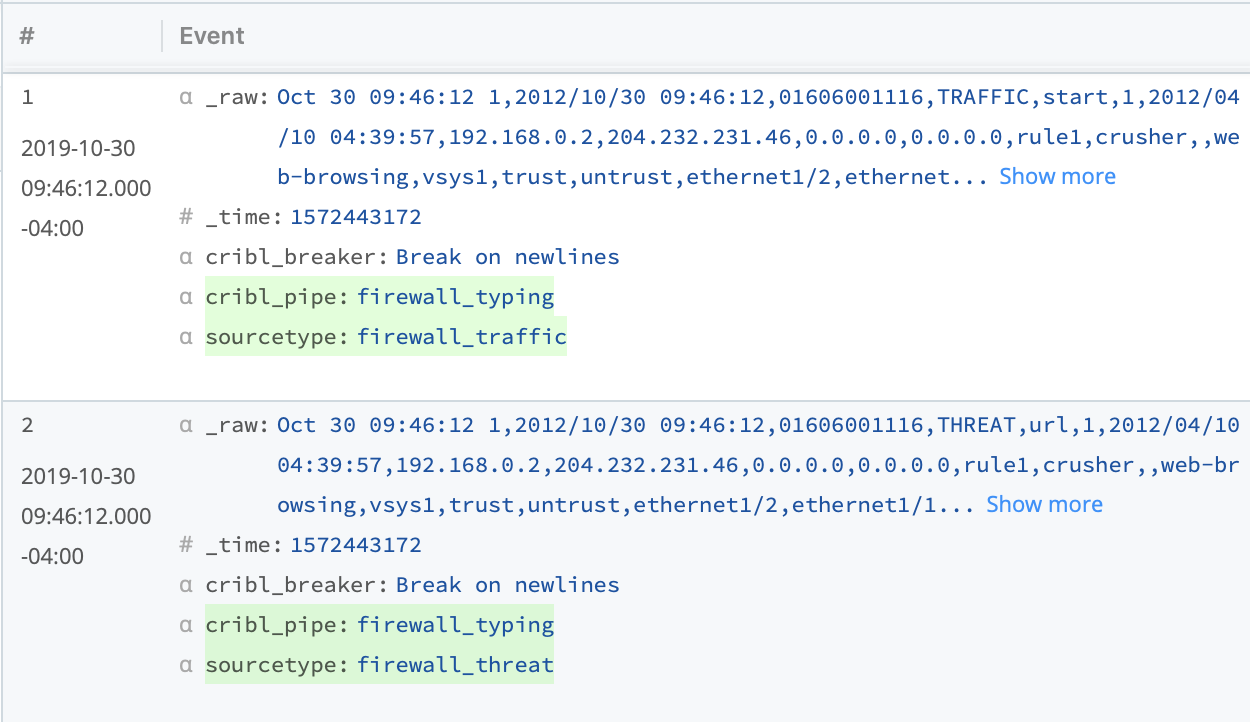
Note that:
- We've changed
Match ModefromExacttoRegex. - We've kept
Match Typeat the default setting ofFirst Match. This is especially important with regex matching because, unlike with exact matching, the same event could match multiple regular expressions in a given lookup. With theFirst Matchsetting enabled, Stream will associate the lookup row with the first regular expression that matches a given event. - By default, all output fields will be associated with a matching event. As a best practice, however, we recommend that you specify output fields, in case the underlying Lookup table is modified.
Using Eval to Modify Destination Indexes
As an added bonus, for popular SIEM destinations, Cribl Stream makes it easy to modify other critical fields like host and index. In this example, we will use the Eval Function to modify each event's index, based on its new sourcetype.
In some SIEM environments, modifying a destination index would require rolling restarts on affected nodes. But if Cribl Stream is part of the data architecture, index modification can happen instantly, with no restart.
To add the Eval Function:
- In the same
firewall_typingPipeline, clickAdd Function, thenStandard, thenEval. - Scroll down to click into your new
EvalFunction. - Under
Evaluate Fields, click+ Add Field. - Configure the
Evaluate Fieldskey-value pair to match this screenshot (click to enlarge):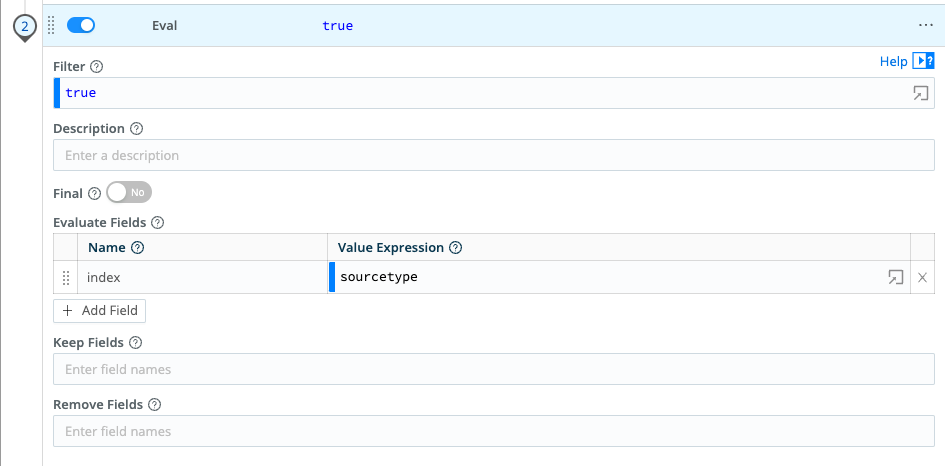
- Click
Save. - In the right Preview pane, toggle between
INandOUT. When selectingOUT, you should see each event's newly addedindexvalue, corresponding to itssourcetype.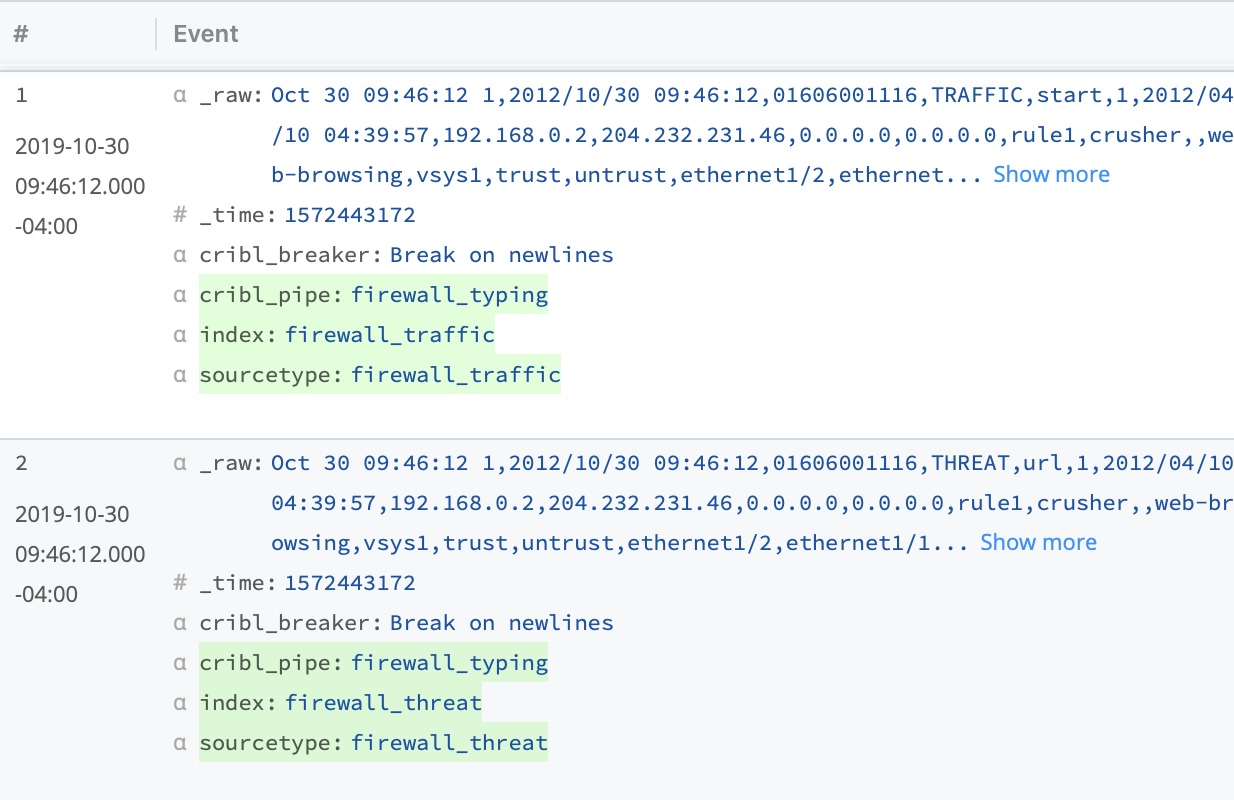
Now, you have configured variable intermingled data to sort itself into the proper sourcetype and index for downstream use.