Configuring the Development Stream Instance
Now, we need to configure our Stream development instance to use the new repository as its Git remote. First, though, we want to commit anything that's already in the dev environment. This is a fresh instance, but we've included some changes for the sandbox setup, and these need to be committed.
- Click the
Stream Devtop tab. (If you are logged out, the credentials areadminfor the user andcribldemofor the password.) - In Stream's own top nav, click the
Version Controlbutton (it looks like this: ), and from theVersion Controlfly-out, clickCommit. - In the resulting
Git Changes – Globaldialog, type a commit message (e.g.,dev initial config) and then click theCommitbutton.
You've now committed all of the changes on this Stream instance to its local Git branch. (Note that the Version Control button's red indicator has cleared.) Now, let's use Stream's UI to connect this local branch to its remote repo. Stay on the Stream Dev top tab for the next few sections.
-
In Stream’s top nav, at the far right, click the
AAbutton to open theAccountmenu. -
Click
Global Settingson this menu. -
This opens Stream's
Global Settingssidebar, with the focus onGeneral Settings. ClickGit Settings, a few links further down the same sidebar. -
On the
Git Settingsnav bar nested to the right, click theRemotetab. -
In the
Remote URLfield, enter or paste the string you earlier copied from the remote repo. If you used the default repo naming, this will be:git@gitops-gitea:gituser/stream-config.gitDifferent Repo NameIf you named your Gitea repo something other than
stream-config, then modify the<reponame>.gitsubstring of the above URL to match your repo's name. -
Stream's
Authentication typedrop-down defaults toSSH, which is the transport we want. Copy and paste the following key into theSSH private keyfield:-----BEGIN OPENSSH PRIVATE KEY-----
b3BlbnNzaC1rZXktdjEAAAAABG5vbmUAAAAEbm9uZQAAAAAAAAABAAAAaAAAABNlY2RzYS
1zaGEyLW5pc3RwMjU2AAAACG5pc3RwMjU2AAAAQQREL+oz/hLb4W8/TA7dQR7em4F6G1RU
3NhujQOjHe2zVUZapKhEdOxmqO3av5ehGOVMyAYmmhosOPkpHTwGCCc0AAAAsGHLF+hhyx
foAAAAE2VjZHNhLXNoYTItbmlzdHAyNTYAAAAIbmlzdHAyNTYAAABBBEQv6jP+Etvhbz9M
Dt1BHt6bgXobVFTc2G6NA6Md7bNVRlqkqER07Gao7dq/l6EY5UzIBiaaGiw4+SkdPAYIJz
QAAAAgSo+UVX4HKkk4XZP39rDcCNEuVpz4teuEqR03dDkGFTwAAAAYc2FuZGJveCtnaXR1
c2VyQGNyaWJsLmlv
-----END OPENSSH PRIVATE KEY----- -
Set the
SSH strict host key checkingtoggle toNo. This will allow your first push to the remote repository to accept the host key information. (We're bypassing the Git CLI client, which would typically prompt for this key when you first push.) -
Click
Save, and look for a green confirmation message. -
Set the
SSH strict host key checkingtoggle back toYes. After the first save, Stream checked the SSH key, and will now throw an error if strict key checking isn't enabled. -
Click
Saveagain.
SSH strict host key checking is a security feature that binds host identifiers to an RSA host key. This allows verification of the host identity prior to establishing an SSH session.
We recommend enabling SSH strict host key checking for all Cribl Stream instances, to minimize the risk of man-in-the-middle and spoofing attacks.
The host identifiers of your Git server will be recorded during your initial Git push or pull. When configuring Stream's Git Settings to communicate with a new host, admins should:
- Disable
SSH strict host key checkingduring initial Git configuration. - Immediately re-enable
SSH strict host key checking, to restrict SSH connections to the newly discovered host. - Perform a Git push or pull, so that the host key is recorded.
Now that we have the remote set up, we need to push the current config to it. This is simple in Stream, and it builds on the commit step we've already used. Still on the Stream Dev top tab:
- In Stream's top nav, again click the
Version Controlbutton (), and from theVersion Controlfly-out, clickCommit. - In the resulting
Git Changes – Globaldialog, enter a commit message (e.g.,Added remote config), and clickCommit and Push.
NOTE: Look for green confirmation messages. If you instead see an error complaining about strict key checking being enabled – and you have not enabled this toggle – go back toGit Settings, enable it, and save. Then try pushing again. - Once that's complete, click the
Giteatop tab. - Click Gitea's
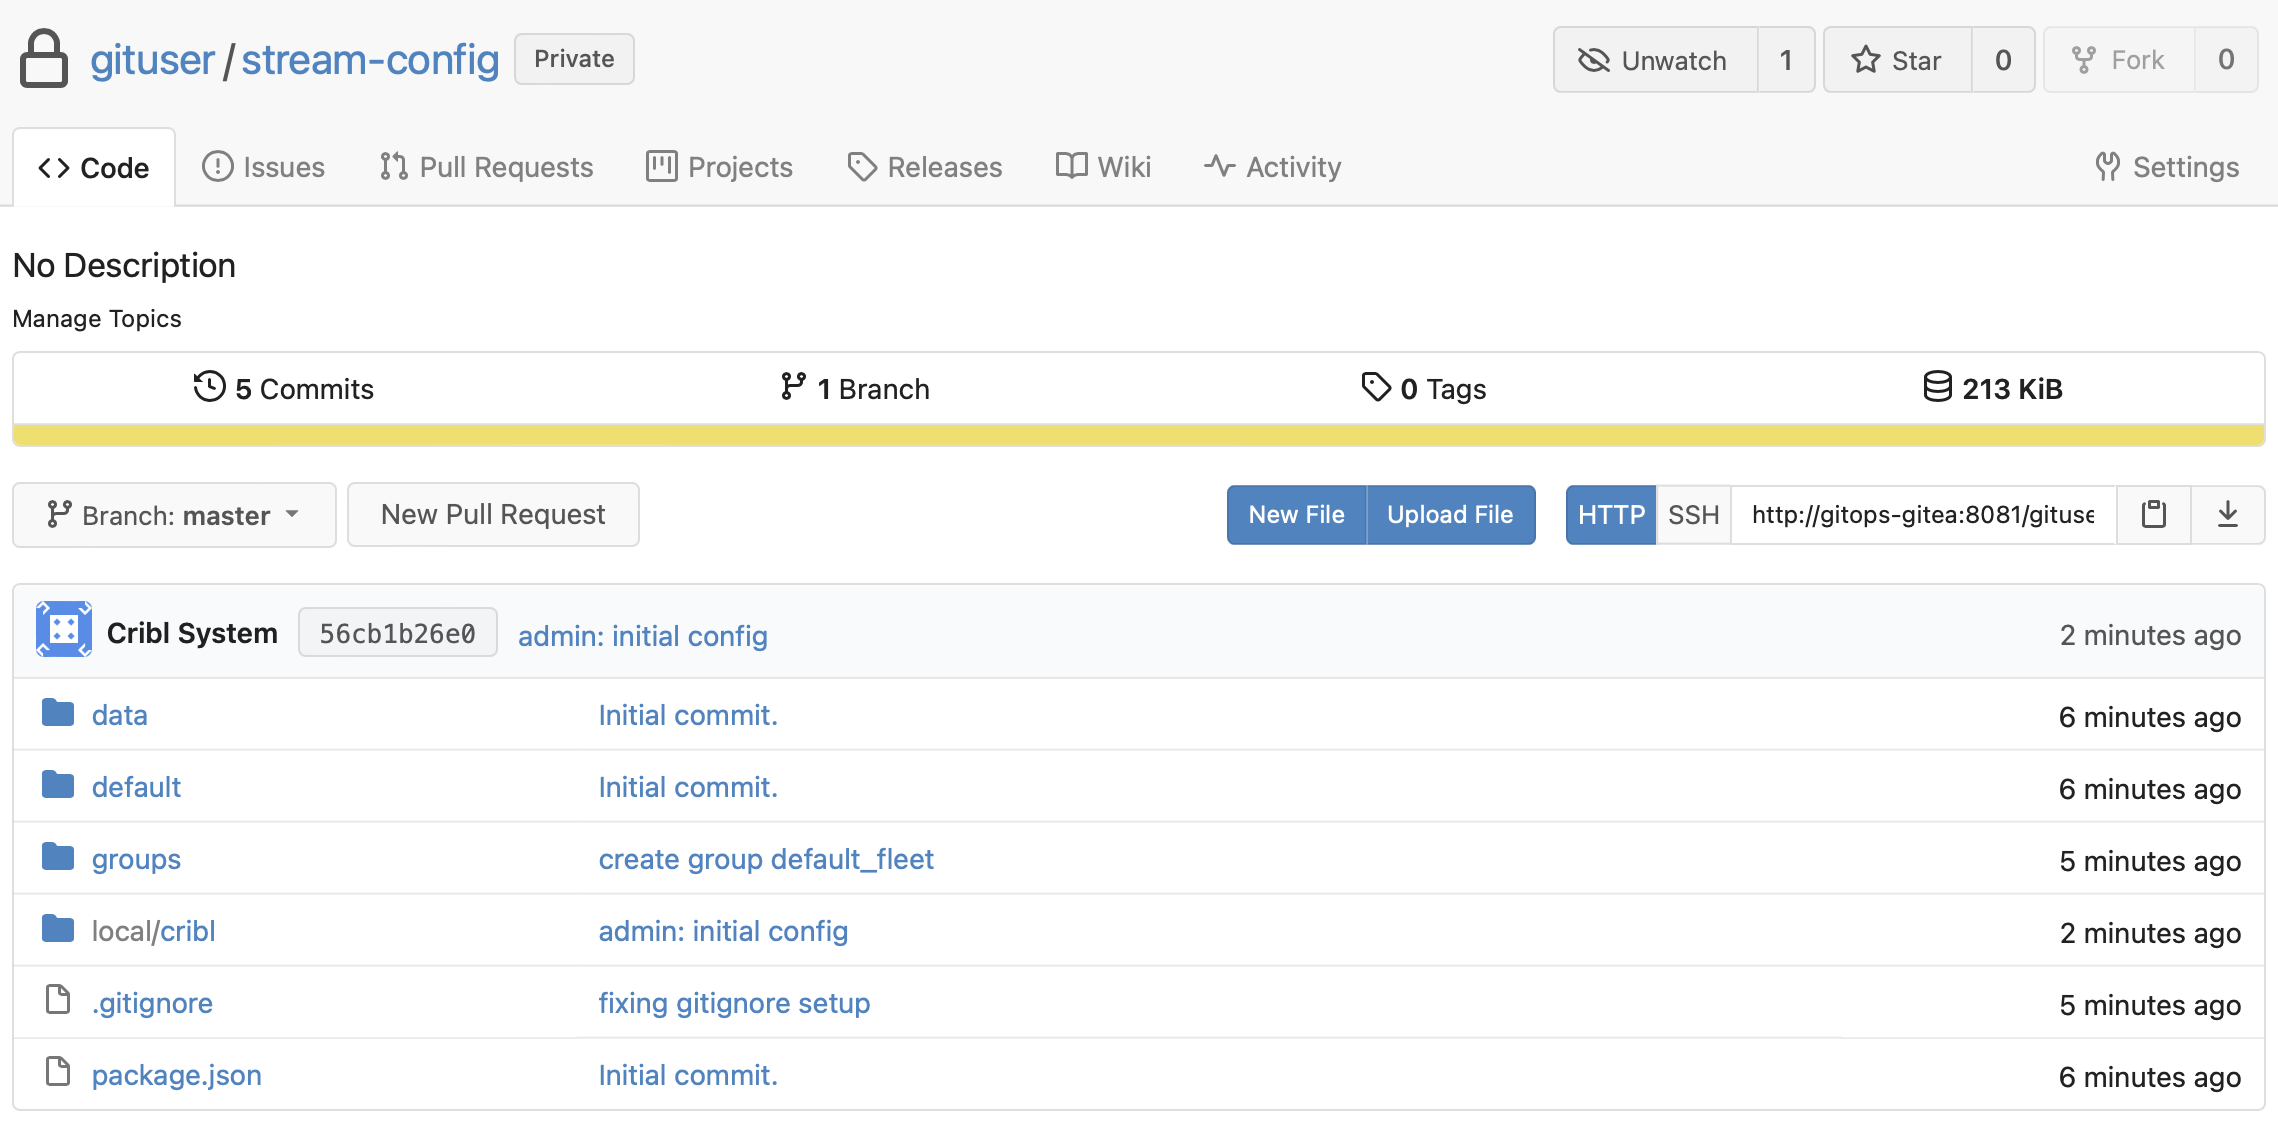
Codetab below thegituser/stream-configrepository name. - This refreshes Gitea's
Codetab, exposing your repo's structure.
You should now see files in the repo, looking similar to this:
Now that we've got a config tree in the repository, we need to create a dev branch, and configure the development instance to use it.
-
Still on
Gitea'sCodetab, open theBranchdrop-down at left, and typedevinto the filter box.
-
Click the
Create branch devlink – shown above – to create the branch.
While we're here, let's also create a prod branch:
- Again open the
Branchdrop-down, and typeprodinto the filter box. - Click
Create branch prodto create the branch.
Now that our dev branch is created, let's configure our Stream development instance to use it:
- Click the
Stream Devtop tab. - Under
Settings>Global Settings>Git Settings, click theGeneraltab nested to the right. - From the
Branchdrop-down, selectdev. - Click
Save. - On the resulting confirmation dialog, Click
Yes. (This will restart Stream to enable the new branch connection.)
We've now set up the dev branch, which we'll use to author configuration changes. Next, let's set up our prod branch to accept those changes.